TPMS Sensor Installation Guide
Correct TPMS sensor installation is an important part of professional tyre and TPMS servicing. A replacement sensor must be correctly programmed for the vehicle application, fitted using the appropriate valve components and followed by the correct vehicle relearn procedure where required.
This step-by-step guide demonstrates the TPMS sensor installation process using the Bartec Rite-Sensor® RS1000, from removing the existing sensor and inspecting the wheel through to programming, valve assembly, tyre fitting, vehicle relearn and the final inspection process.
The exact procedure can vary by vehicle and sensor application. Always follow the instructions provided by the TPMS tool and relevant manufacturer guidance. For product information, see the Rite-Sensor® RS1000 TPMS Sensor or explore Bartec's programmable and replacement TPMS sensors.
How to Install a TPMS Sensor
The following process demonstrates the main stages of TPMS sensor replacement using the Bartec Rite-Sensor® RS1000. Installation and servicing should only be carried out by trained personnel using suitable tyre servicing and TPMS equipment. Incorrect installation may result in TPMS sensor failure. Read and understand the relevant installation and safety instructions before beginning the procedure.
Step 1: Deflate and Disassemble the Tyre and Wheel
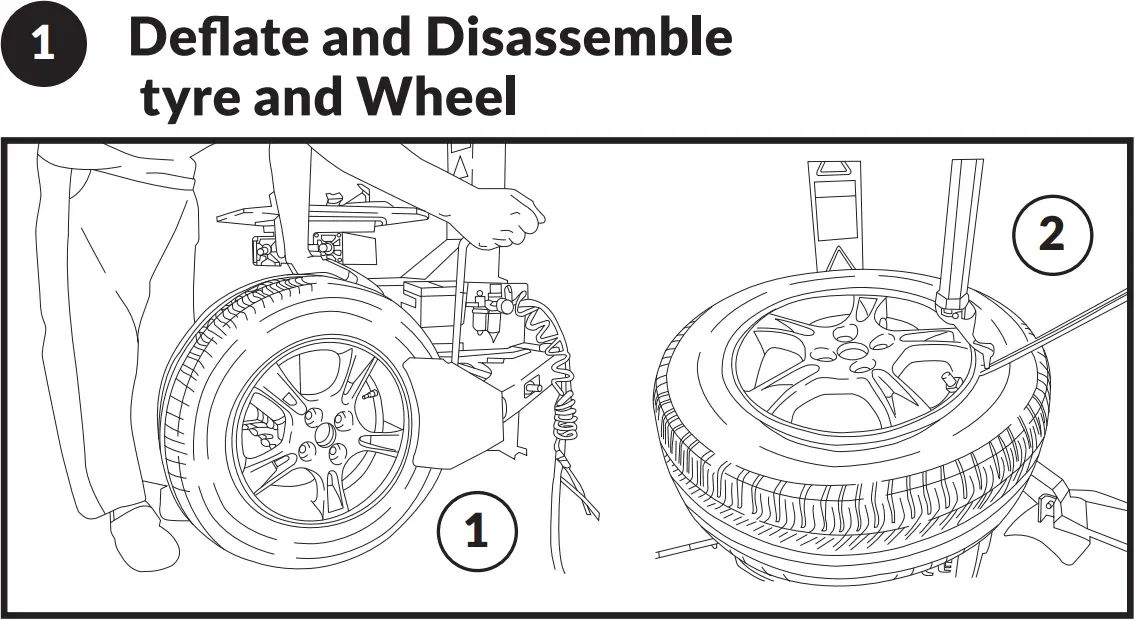
Before removing the existing TPMS sensor, fully deflate the tyre by removing the valve core. Once the tyre is completely deflated, disassemble the tyre from the wheel using suitable tyre servicing equipment.
When initially breaking the tyre bead, ensure the valve and TPMS sensor are positioned on the opposite side of the wheel from the bead breaker blade to reduce the risk of sensor damage.
Step 2: Detach the Sensor, Remove the Valve Stem and Inspect the Wheel
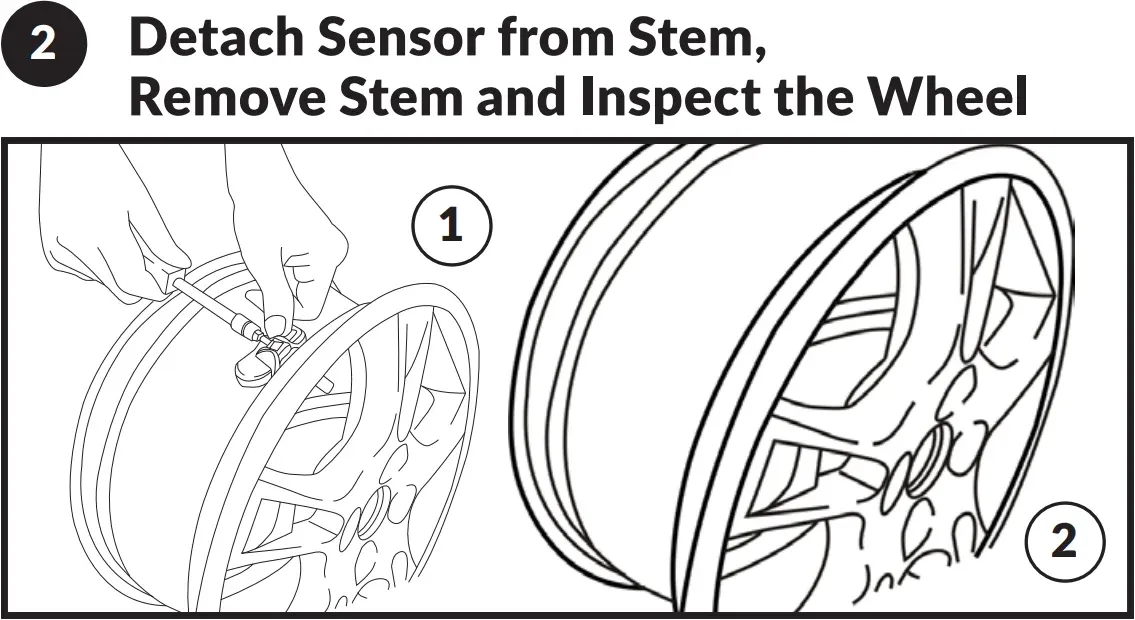
Detach the existing TPMS sensor from the valve stem, then remove the valve stem from the wheel. Take care during removal to avoid damaging the wheel or valve mounting area.
Before fitting the replacement sensor, inspect the wheel and valve mounting area to make sure they are in suitable condition for installation.
Step 3: Program the Rite-Sensor® Using a Bartec TPMS Tool
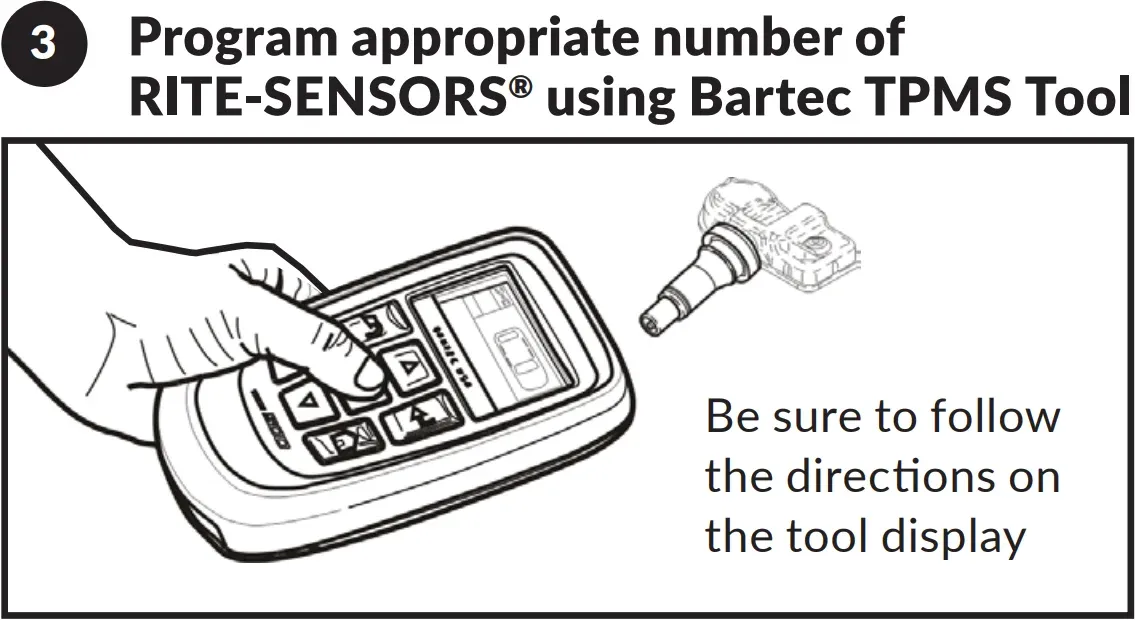
Before use, the Rite-Sensor® must be programmed for the specific vehicle application being serviced. Use the vehicle's correct year, make and model information when selecting the application on the TPMS tool.
Follow the on-screen instructions on the Bartec TPMS tool to program the appropriate number of Rite-Sensors® required for the vehicle.
Step 4: Fit the Rite-Sensor® with Rubber Valve Stem
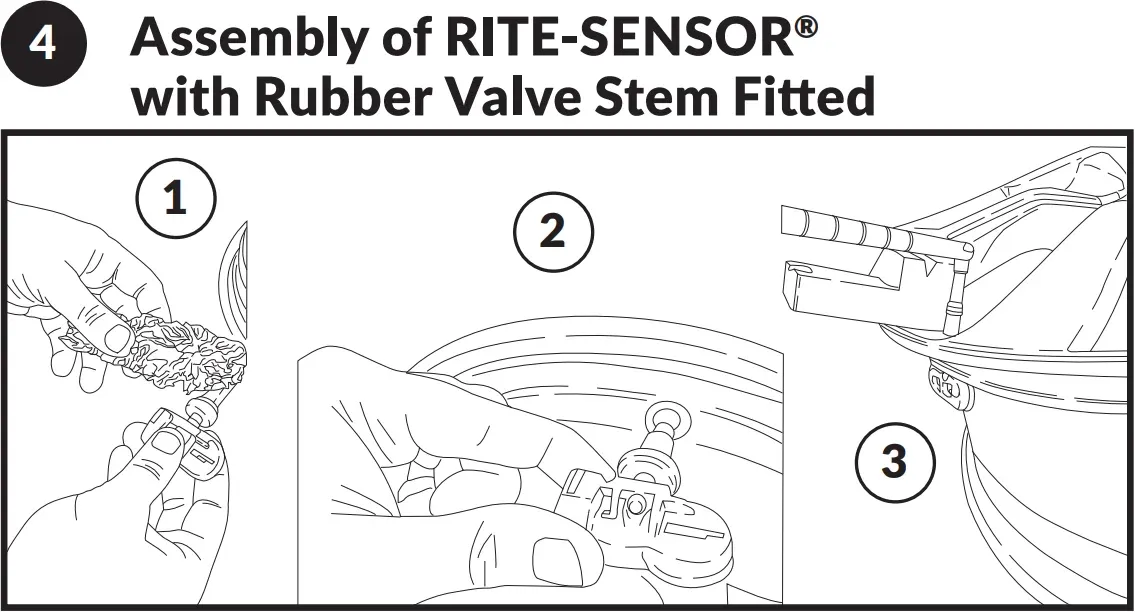
The Rite-Sensor® comes assembled with a rubber snap-in valve stem, ready for applications where the rubber valve is appropriate. An optional aluminium clamp-in valve stem is also supplied for applications where this is required; this is covered in Step 5.
Insert the rubber valve stem through the valve hole and pull it securely into position using a suitable valve stem installation tool, taking care not to apply excessive force to the sensor body.
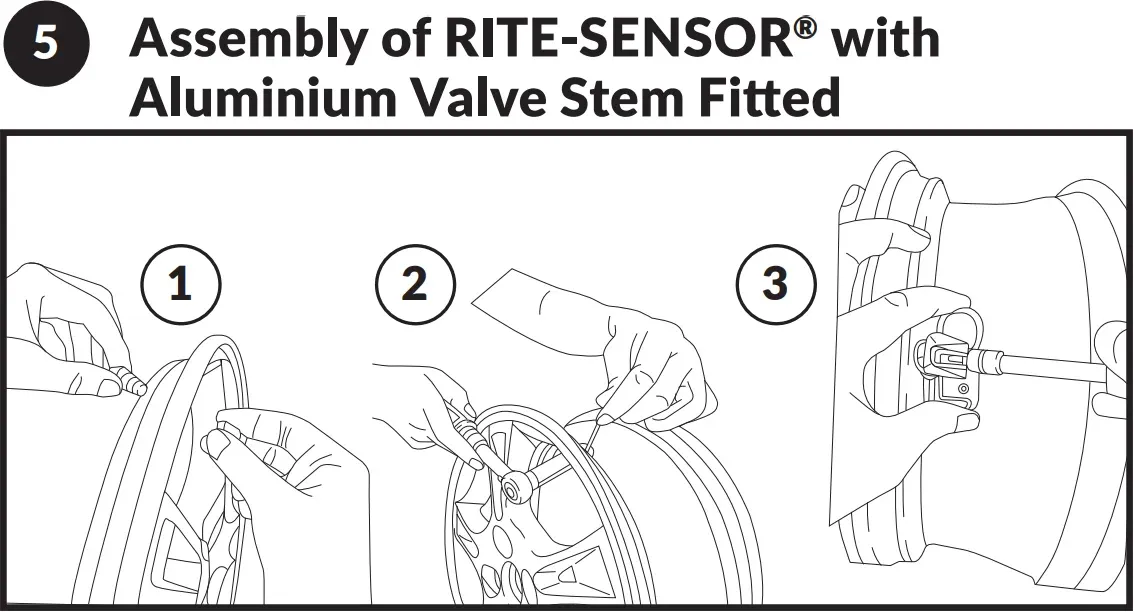
Step 5: Fit the Rite-Sensor® with Aluminium Valve Stem
Where an aluminium clamp-in valve stem is required, remove the rubber valve stem by unscrewing the fastener. Insert the aluminium stem into the Rite-Sensor®, then fit the anti-rotation pin into the hole at the base of the stem, just above the sensor body.
Insert a new fastener into the stem and tighten it to the specified torque of 35.5 in-lbs (4 Nm). The aluminium valve assembly can then be fitted to the wheel.
Step 6: Mount the Tyre to the Wheel
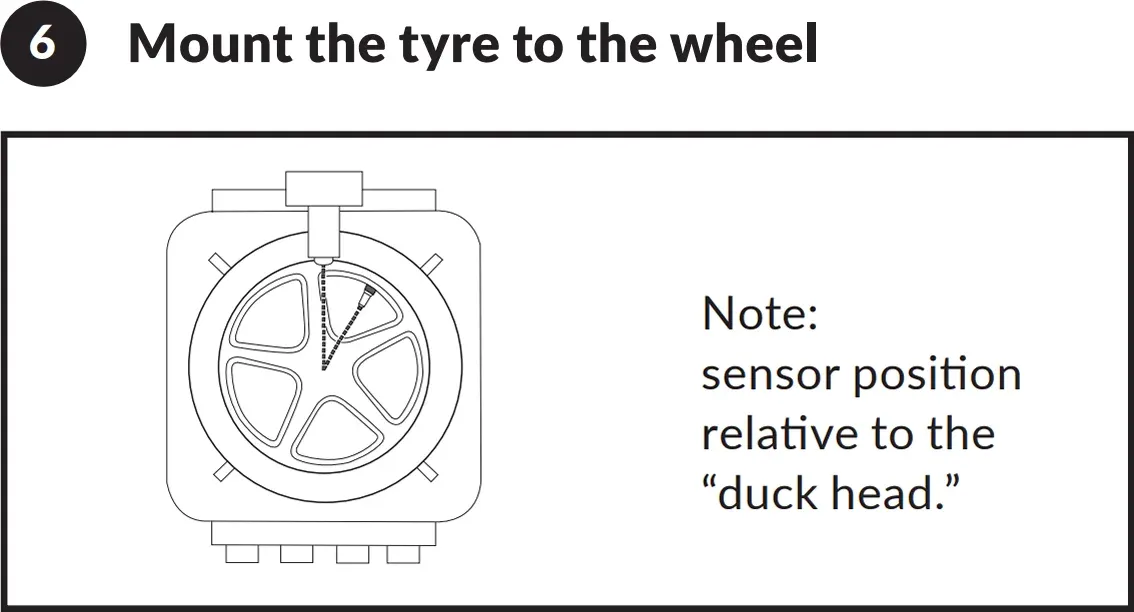
With the Rite-Sensor® correctly installed, mount the tyre back onto the wheel using suitable tyre fitting equipment.
During mounting, pay close attention to the position of the TPMS sensor relative to the tyre machine's mounting head ("duck head") to avoid contact with or damage to the sensor.
Step 7: Program the Rite-Sensor® in the Wheel (Optional)
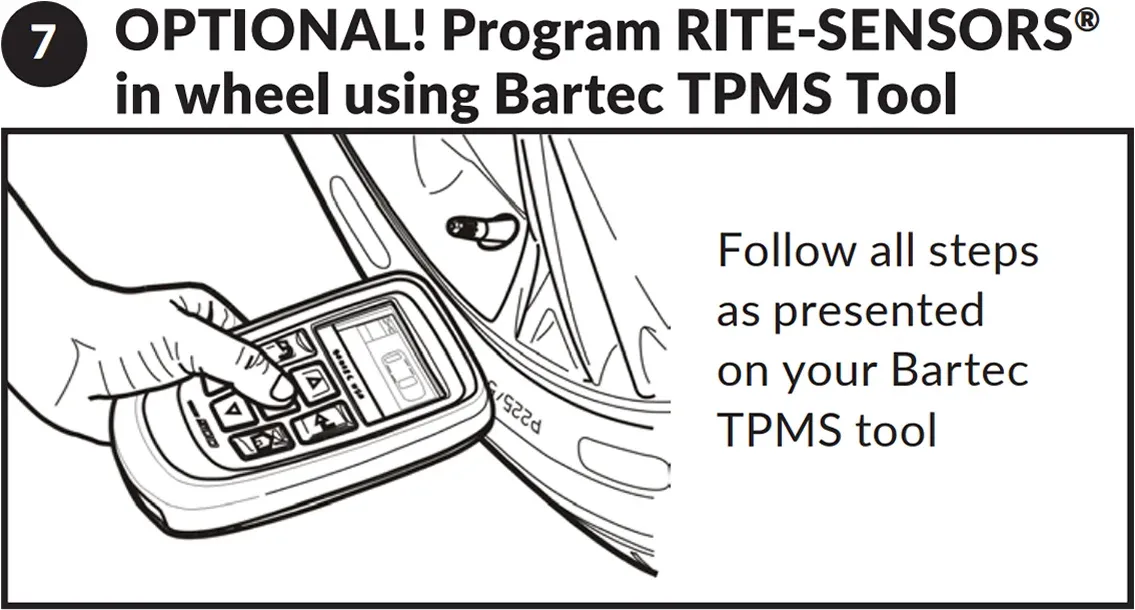
If the Rite-Sensor® was not programmed before installation, it can be programmed while fitted in the wheel using a compatible Bartec TPMS tool.
Follow the on-screen instructions on the TPMS tool and use the correct vehicle application information when programming the sensor. If the sensor was already programmed in Step 3, this optional stage can be skipped.
Step 8: Complete the Vehicle Relearn
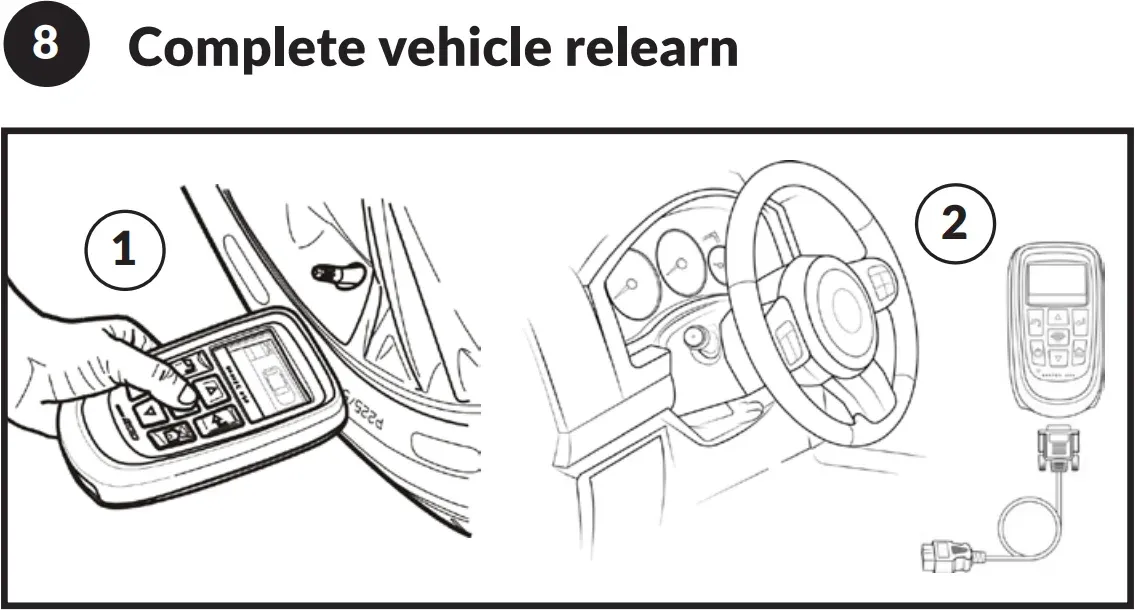
Once the Rite-Sensor® has been programmed and installed, complete the vehicle's required TPMS relearn procedure so the vehicle can recognise the replacement sensor.
Use the Bartec TPMS tool and follow the on-screen instructions for the specific vehicle application, as the required relearn procedure can vary between vehicles.
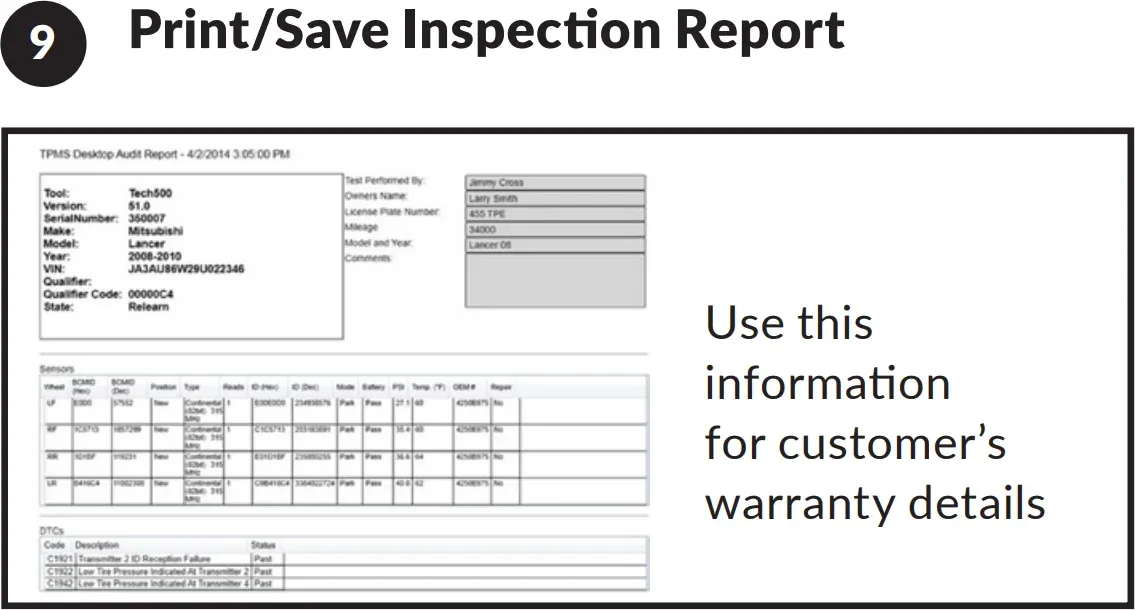
Step 9: Print or Save the Inspection Report
Once the installation and vehicle relearn are complete, use the Bartec TPMS tool to print or save the inspection report.
Keep the inspection information as a record of the completed TPMS service and for the customer's warranty details.
Important TPMS Sensor Installation Notes
Correct servicing of the valve components is an important part of TPMS sensor installation. When servicing a snap-in sensor, the valve stem should be replaced. For a clamp-in sensor, the valve nut/collar/core and rubber grommet should be replaced, with the valve stem replaced where necessary.
Always use the correct components and specified torque values for the sensor being installed. For the Rite-Sensor® clamp-in valve, Bartec specifies that the nut/collar should be tightened to 35.5 in-lbs (4 Nm).
For complete product, installation, safety and warranty information, refer to the official Bartec Rite-Sensor® User Guide.